Product Description:
A “Base Kit” SKU must be accompanied by the SKU of a Sway Bar and Leaf Spring option to form a complete system.
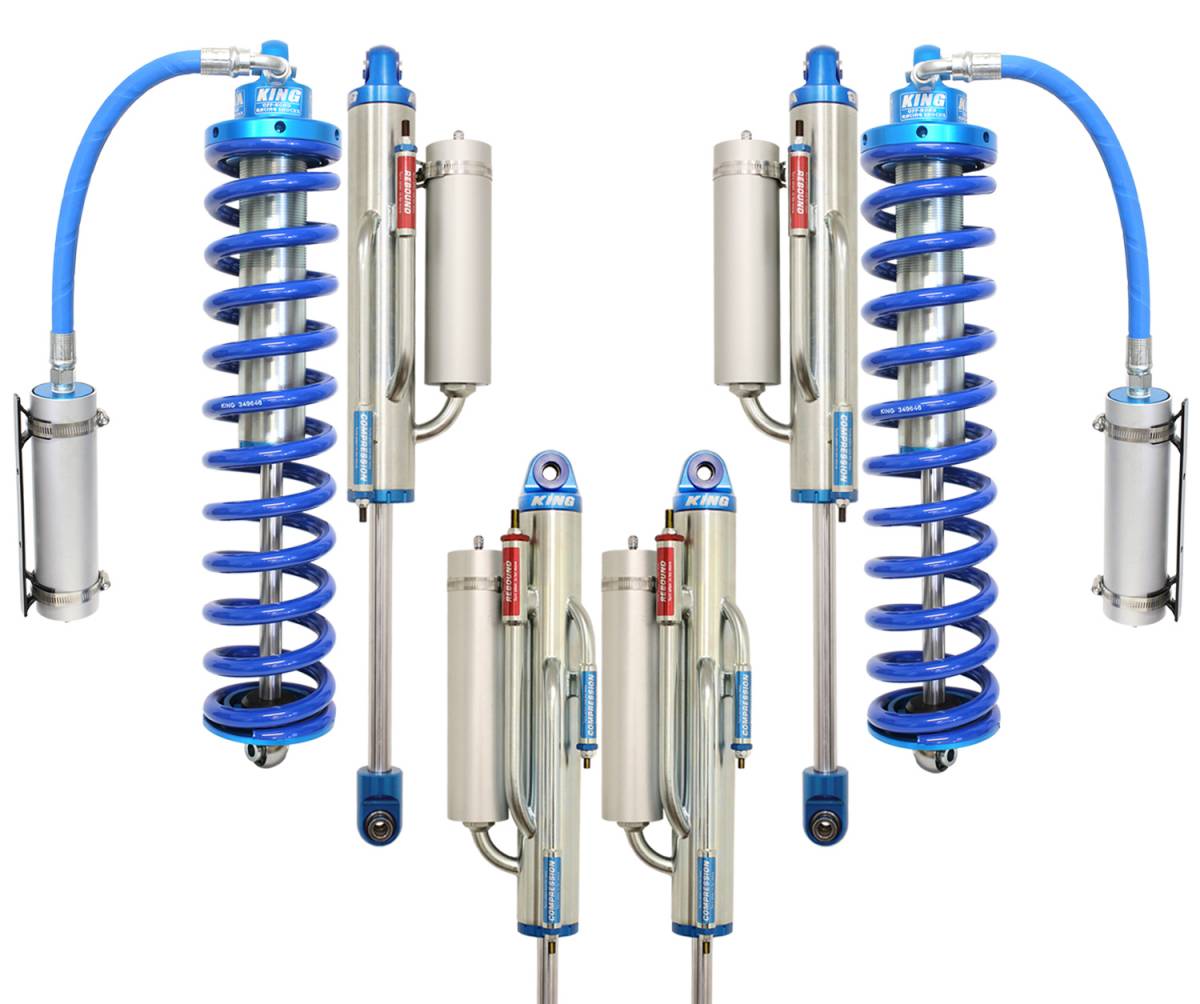
Providing height adjustability, dual front shocks and ultimate bottom-out resistance, the Coilover Bypass kit is the best option for the avid off-roader. 2.5″ Coilover and 2-Tube, 2.5″ bypasses adorn the front wheel well, while 3-Tube Rear Bypasses and Full Progressive Leaf Springs round off the rear. This system maintains great on-road manners and is the most off-road capable of our 4.5″ lift lineup.
| Front Lift | Rear Lift | Front Travel | Rear Travel | Shock Diameter | Tire Fitment |
|---|---|---|---|---|---|
| 4.5″ | 0-3.5″ | 10″ | 13″ | 2.5″ | 37″ x 13.5″ |
Ford 4.5" Coilover 2.5 Bypass System, 2005-2007 Base Kit
Base Kit Includes:
| CS-FCO25SPKG-BYP-45-05 | Carli Custom Tuned KING 2.5" Remote Reservoir Coilovers, 2-Tube Front and 4 Tube Rear Bypass Shocks, with Stainless Shafts & Reservoir Mounts |
| CS-FCOMKIT-05 | Coilover Mounts |
| CS-FBLT-05 | Brake Line Tabs |
| CS-FORDBBL-05 | Brake Lines |
| CS-FRAD-05 | Radius Arm Drops |
| CS-FBDF-05-4.5 | Bump Stop Drops |
| CS-FCASTERSHIM-4.5 | 1° Caster Shims |
| CS-FPRB-05 | Track Bar |
This is one of our most capable off-road systems. Similar in street ride to the Coilover and Pintop kit with seemingly no bottom, we spec’d this system with King 2.5” Front Coilovers, 10” Stroke 2-Tube Front Bypasses, 12” Stroke Rear 3-Tube Bypass with an oversized rebound tube. This system is also height adjustable approximately 1” to compensate for large bumpers/winches.
For those unfamiliar, a bypass shock has external tubes with one-way check valves that are fully adjustable to allow users to tailor the amount of fluid that bypasses the piston/valving on either the compression or rebound stroke within the effective range of the bypass tube. Typically, there will be a tube surrounding the compression zone at ride height that will allow fluid to freely move around the piston giving a supple ride. Once a large hit is encountered, the piston will move upward closing off the port, thereby forcing all fluid through the valving which substantially increases the shock’s resistance in this secondary zone. This acts as an internal bump-stop of sorts and gives tunable progression to the shock making it the perfect dual purpose setup.
Conversely, on the rebound side, we normally spec tubes that are oversized and deep in the travel stroke to allow a high volume of oil to bypass ensuring the shock shaft comes out quick enough to maintain contact with the ground (doesn’t get hung-up in the bump-zone after a large hit). As the shock extends and closes off the rebound tube, all the valving on the rebound side engages to slow the shaft as it reaches maximum extension, top-out. Simply put, the larger the shock diameter, the more capable the setup; the more tubes and “zones”, the more adjustability; the larger the tubes, the more fluid can flow around the piston and the more valving you can run to increase the stopping power in the “bump-stop” or “top-out” zone.